How To Show Confirm Alert Box In ASP.NET MVC Before Deleting Record

In this article, we will learn how to show the confirm alert box before deleting or ensuring any user action. Let's consider we have the following html table which has a list of records.
<table class="table">
 <tr>
 <th>
 @Html.DisplayNameFor(model => model.Name)
        </th>
        <th>
            @Html.DisplayNameFor(model => model.City)
        </th>
        <th>
            @Html.DisplayNameFor(model => model.Address)
        </th>
        <th></th>
    </tr>

    @foreach (var item in Model)

    {
        @Html.HiddenFor(model => item.Empid)
        <tr>
           <td>
                @Html.DisplayFor(modelItem => item.Name)
            </td>
            <td>
                @Html.DisplayFor(modelItem => item.City)
            </td>
            <td>
                @Html.DisplayFor(modelItem => item.Address)
            </td>
            <td>
              @Html.ActionLink("Edit", "EditEmpDetails", new { id = item.Empid }) |
               @Html.ActionLink("Delete", "DeleteEmp", new { id = item.Empid }
               )
         </td>
        </tr>
  }
</table>
We don't need a JavaScript or jQuery function to show the alert box, you just need to modify the ActionLink in view. The steps are as follows.
@Html.ActionLink("Delete", "DeleteEmp", new { id = item.Empid },
new { onclick = "return confirm('Are sure wants to delete?');" })
In the above ActionLink
  • Delete is the ActionLink Name.  
  • DeleteEmp is the ActionResult name .
  • EmpId is the unquie id from which specific records are deleted. 
After clicking on the delete button, the alert box will be shown as follows.


I hope from all the preceding examples you have learned how to show an alert box Action Link click in ASP.NET MVC.

Related articles

How To Read TextBox Values By Id Using jQuery

In this article we will learn how to read Text Box values using jQuery. Consider the following is the Razor View in MVC Named Employee having the following HTML controls.
<div class="form-horizontal">
        <div class="editor-label">
            Name
        </div>
        <div class="editor-label">
            <input type="text" id="txtName" />
        </div>

        <div class="editor-label">
            Address
        </div>
        <div class="editor-label">
            <input type="text" id="txtAddress" />
        </div>

        <div class="editor-label">
            City
        </div>
        <div class="editor-label">
            <input type="text" id="txtcity" />
        </div>
        <div class="editor-label">
            <br />
            <input class="btn-default" type="button" id="btnSave" value="Save" />
        </div>
    </div>
To read the Text Box values using jQuery ,use the following syntax.
//Reading text box values using Jquery 
$("#txtName").val(),
$("#txtAddress").val(),
$("#txtcity").val()
Create the following jQuery function to read the text box values by Id using the jQuery on button click.
$(document).ready(function () {
        $("#btnSave").click(function () {
            $.ajax(
            {
                type: "POST", //HTTP POST Method
                url: "Home/AddEmployee", // Controller/View 
                data: { //Passing data
                    Name: $("#txtName").val(), //Reading text box values using Jquery 
                    City: $("#txtAddress").val(),
                    Address: $("#txtcity").val()
                }

            });

        });
    });

Note

To work with jQuery, we need to reference the jQuery library at the head section of the HTML file. You can use either CDN jQuery library or offline reference.
CDN Reference Example
<script src="https://ajax.googleapis.com/ajax/libs/jquery/1.11.3/jquery.min.js"></script> 
To use the above jQuery library, you need an active internet connection. You can download and use it as an offline jQuery library as well. You need to add reference as below.

Offline Reference Example
<script src="~/Scripts/jquery-1.10.2.min.js"></script>

I hope from the above examples, you have learned how to read a TextBox values by Id using jquery.

Related Articles

Show Confirm Alert Box

Before deleting records we need show confirm alert box to ensure something should not delete or edit the records accidently. Let us consider following html table which has list of records

<table class="table">
 <tr>
 <th>
 @Html.DisplayNameFor(model => model.Name)
        </th>
        <th>
            @Html.DisplayNameFor(model => model.City)
        </th>
        <th>
            @Html.DisplayNameFor(model => model.Address)
        </th>
        <th></th>
    </tr>

    @foreach (var item in Model)

    {
        @Html.HiddenFor(model => item.Empid)
        <tr>
           <td>
                @Html.DisplayFor(modelItem => item.Name)
            </td>
            <td>
                @Html.DisplayFor(modelItem => item.City)
            </td>
            <td>
                @Html.DisplayFor(modelItem => item.Address)
            </td>
            <td>
              @Html.ActionLink("Edit", "EditEmpDetails", new { id = item.Empid }) |
               @Html.ActionLink("Delete", "DeleteEmp", new { id = item.Empid }
               )
         </td>
        </tr>
  }
</table>
Now to show alert box just modify the ActionLink in view are as follows
@Html.ActionLink("Delete", "DeleteEmp", new { id = item.Empid },
new { onclick = "return confirm('Are sure wants to delete?');" })
In the above ActionLink
  • Delete is the ActionLink Name.  
  • DeleteEmp is the ActionResult name .
  • EmpId is the unquie id from which specific records are deleted. 
After clicking on delete button the alert box will be shown are as follows


I hope from all preceding examples , you have learned how to show alert box Action Link click in ASP.NET MVC.

Summary

I hope this article is useful for all readers. If you have any suggestion then please contact me.

Disable Mouse Right Click on Entire ASP.NET MVC Application

Most challenging task in today's application is to secure them from many types of attacks and as developer our job is to provide full security as we have possible in various ways. In this article we will learn how to disable mouse right click using different ways .So considering the preceding requirement I have decided to write this article .Now let's learn step by step, which helps beginners to learn how to disable mouse right click on entire ASP.NET MVC application. 

Create an ASP.NET MVC Application.

Now let us start with a step by step approach from the creation of a simple MVC application
  1. "Start", then "All Programs" and select "Microsoft Visual Studio 2015".
  2. "File", then "New" and click "Project", then select "ASP.NET Web Application Template", then provide the Project a name as you wish and click OK. After clicking then choose the empty application and check on MVC option  .
    If don't know how to create ASP.NET MVC application then you can refer previous articles with the help of following link.
    I hope you have created ASP.NET MVC Application, there are many ways to disable mouse right click and each one of them has pros and cons , the following are commonly used approaches.
    • Using contextmenu in Body tag
    • Using contextmenu with jQuery.
    • Using JavaScript .

    Using oncontextmenu in Body tag

     This is the shortest way to disable mouse right click without writing any script code but by default it uses javascript .
    To use it , just called the contextmenu function in page body tag or master page body tag to disable the mouse right click as
    Example

     In the preceding example , the function is called in layout body tag hence it will disable mouse right click on entire ASP.NET application, If you wants to disable only page specific then you can call same function in specific page.
     Disadvantage of this approach is it wont be work outside the body tag , if click on outside of text then it will allows to mouse right click .

      Using contextmenu with jQuery

    This is the best way to disable the mouse right click which supports on every browser and won't be allow for mouse right click.

    Example
      
    <script>
            $(document).ready(function () {
    
                $(this).bind("contextmenu", function (e) {
    
                    e.preventDefault();
                   
                });
    
    
            });
          
        </script>
    Call preceding function inside the body tag of layout page if you wants to disable mouse right click on entire ASP.NET MVC application.
    Now open the layout page of our created application and add preceding function inside the layout body tag .after modifying the code the layout page source code will be look like as shown in following example.

    _Layout.cshtml

    <!DOCTYPE html>
    <html>
    <head>
        <meta charset="utf-8" />
        <meta name="viewport" content="width=device-width, initial-scale=1.0">
        <title>@ViewBag.Title - www.compilemode.com</title>
        <link href="~/Content/Site.css" rel="stylesheet" type="text/css" />
        <link href="~/Content/bootstrap.min.css" rel="stylesheet" type="text/css" />
        
    
        <script src="~/Scripts/jquery-3.1.0.min.js"></script>
        <script src="~/Scripts/bootstrap.min.js"></script>


    </head>
    <body>
      
        <script>
            $(document).ready(function () {
    
                $(this).bind("contextmenu", function (e) {
    
                    e.preventDefault();
                   
                });
    
    
            });
          
        </script>
    
        <div class="navbar navbar-inverse navbar-fixed-top">
            <div class="container">
                <div class="navbar-header">
                    <button type="button" class="navbar-toggle" data-toggle="collapse" data-target=".navbar-collapse">
                        <span class="icon-bar"></span>
                        <span class="icon-bar"></span>
                        <span class="icon-bar"></span>
                    </button>
                    @Html.ActionLink("www.compilemode.com", "www.compilemode.com", "Home", new { area = "" }, new { @class = "navbar-brand" })
                </div>
                <div class="navbar-collapse collapse">
                    <ul class="nav navbar-nav">
                    </ul>
                </div>
            </div>
        </div>
    
        <div class="container body-content">
            @RenderBody()
            <hr />
            <footer>
                <p>&copy; @DateTime.Now.Year -www.compilemode.com</p>
            </footer>
        </div>


    </body>
    </html>

    Now create on empty view named Index to check the whether mouse right click disable or not .

    Index.cshtml

    @{     ViewBag.Title = "www.compilemode.com"; } 
    <hr />
    Visit <a href="https://www.blogger.com/null">www.compilemode.com</a> to learn more about Microsoft Technologies. 
    <hr />
    Now we have done with the code .After running the application in the browser it shows the following output  

    Without alert Box

    Right click on page , it will not show you mouse right click , it means it disable for page level as wel as on entire ASP.NET MVC application. 

     With Alert Box

    If you wants to show alert Box then just call alert function in our created jQuery function after e.preventDefault() function .


     Note:
    • Its not good practice to show user mouse right click alert box because of this we exposing our security measurement what we had done so its always good to do not show alert box.
    • To use jQuery  we need to add the reference for the jQuery library .You can download the latest jQuery library from JQuery official site
    From preceding all example we have learned how to to disable mouse right click on page specific as well as on entire application .
    Summary
    I hope this article is useful for all readers, If you have any suggestion related to article then please contact me.

    Related articles

    Call Action Method Using Ajax Get Request in ASP.NET MVC

    In many forum post, I have read one common question that is how to make jQuery ajax GET request with input parameter in ASP.NET MVC , So by considering above requirement I have decided to write this article.
    Lest consider the scenario we have action method in named Details in Home controller which takes the Id as input parameter .Then jQuery function will be look like as follows.
    $(document).ready(function () {
            $("#btnGetDetails").click(function () {
                $.ajax({
                    //base address/controller/Action
                    url: 'http://localhost:51163/Home/Details',
                    type: 'GET',
                    data: {
                        //Passing Input parameter
                        id: $('#txtId').val()
                    },
                    success: function (result) {
                       //write something
                    },
                    error: function () {
                        alert("error");
                    }
                });
                return false;
            });
        });
    
    Suppose following is the Home controller having action result method named Details which takes id as input parameter.
    HomeController.cs
      public class HomeController : Controller
        {
            
            [HttpGet]
            public ActionResult Details(int id)
            {
            //write logic here to get data
    
            return View();
            }
        }
    Note
    • To work with jQuery we need to reference of jQuery library .You can use following CDN jQuery library from any provider such as Microsoft,Google or jQuery .
    <script src="https://ajax.googleapis.com/ajax/libs/jquery/1.11.3/jquery.min.js"></script> 
    To use above jQuery library you need an active internet connection , You can download and use it as offline .You need to be add reference as like below.
    <script src="~/Scripts/jquery-1.10.2.min.js"></script>
    From preceding example we have learned how to make  jQuery Ajax GET request with input parameter in ASP.NET MVC.
    Summary
    I hope this article is useful for all readers, If you have a suggestion related to this article then please contact me.
     To learn ASP.NET MVC step by step please refer following articles

    Comma Separated Auto Complete TextBox In ASP.NET MVC Using jQuery JSON

    Many times, we need to add comma separated values in a text box from autocomplete TextBox to fulfill the particular requirement.  Let's say, we have one page to send the emails. Then consider, we want to send emails to multiple recipients with cc and emails Id's from coming from database using autocomplete TextBox. In this type of scenario, we need a comma separated autocomplete TextBox .Let's start implementing this scenario by creating one simple ASP.NET MVC application, step by step .
    Step 1: Create ASP.NET MVC Application
    1. Go to "Start" --> "All Programs"  --> select "Microsoft Visual Studio 2015".
    2. Go to "File" --> "New" --> click "Project" --> select "ASP.NET Web Application Template". Then, provide the project a name as you wish and click OK. After clicking, the following window will appear:
    Step 2: Create Model Class
    Now, let us create the model class file named EmployeeModel.cs by right clicking on "Models" folder, as in the following screenshot:


    Now, the EmployeeModel.cs class file code snippet will look like this:
    EmployeeModel.cs 
    using System.ComponentModel.DataAnnotations;  
    namespace CommaSepratedAutoCompleteTextBox.Models  
    {  
        public class EmployeeModel  
        {  
            public int EmpId { get; set; }  
            public string EmpName { get; set; }  
      
        }  
    }  
    Step 3: Add Controller Class
    Now, add the MVC 5 controller, as in the following screenshot:


    After clicking on Add button, it will show the window. Specify the Controller name as Home with suffix Controller.
    Note: 
    The controller name must have a suffix as 'Controller'.
    Now, modify the default code in HomeController.cs class file and create two action methods, after modifying the code will look like as the following:
    using CommaSepratedAutoCompleteTextBox.Models;  
    using System.Collections.Generic;  
    using System.Linq;  
    using System.Web.Mvc;  
      
    namespace CommaSepratedAutoCompleteTextBox.Controllers  
    {  
        public class HomeController : Controller  
        {  
      
            // GET: Home  
            public ActionResult EmpoyeeDetails()  
            {  
                return View();  
            }  
      
      
            [HttpPost]  
            public JsonResult GetAutoEmpName(string Prefix)  
            {  
      
                //Adding list of records into list  
                List<EmployeeModel> ObjList = new List<EmployeeModel>()  
                {  
                    new EmployeeModel {EmpId=1,EmpName="Vithal Wadje" },  
                    new EmployeeModel {EmpId=2,EmpName="Suhir Wadje" },  
                    new EmployeeModel {EmpId=3,EmpName="Anil Kumar" },  
                    new EmployeeModel {EmpId=4,EmpName="Ravi" },  
                    new EmployeeModel {EmpId=5,EmpName="Ramesh s" },  
                    new EmployeeModel {EmpId=6,EmpName="Sachin Y" },  
                    new EmployeeModel {EmpId=7,EmpName="Vikran T"},  
                      
      
            };  
                //Searching records from list using LINQ query.   
                var EmpName = (from e in ObjList  
                                where e.EmpName.ToLower().StartsWith(Prefix.ToLower())  
                               select new { e.EmpName });  
                return Json(EmpName, JsonRequestBehavior.AllowGet);  
            }  
      
        }  
    }  
    In the preceding code, instead of going to database for records, we are creating the generic list from model class and we will fetch records from above generic list. We can get same records from database as well.
    Step 4: Add Reference of  jQuery UI CSS and JS library
    There are many ways to add the reference of jQuery library into our project. The following are some methods:
    1. Using NuGet package manager, you can install library and reference into the project.
    2. Use CDN library provided by Microsoft, jQuery, Google or any other which requires active internet connection.
    3. Download jQuery files from jQuery official website and reference into the project.
    In the preceding procedure of adding references of libraries into the project, 1 & 3 steps don't require the active internet connection but if you are following second step, it requires active internet connection to load the CDN library's references into the project .
    In this example, I have followed the third step to add the jQuery UI libraries references. Now, open the Layout.cshtml page to add the references. The Layout.cshtml page's header section will be look like:
    Layout.cshtml
    @*Uncomment following lines, If you wants to use CDN jquery-ui.css and jquery-ui.js*@  
       @*<link rel="stylesheet" href="//code.jquery.com/ui/1.11.4/themes/smoothness/jquery-ui.css">*@  
       @*<script src="//code.jquery.com/ui/1.11.4/jquery-ui.js"></script>*@  
         
       <script src="~/Scripts/jquery-1.10.2.min.js"></script>  
       <link href="~/Content/jquery-ui.css" rel="stylesheet" />  
       <script src="~/Scripts/jquery-ui.js"></script> 
    Step 5: Create jQuery Ajax function.
    To call controller JSON action method and invoke autocomplete function including for comma separated search text, write the following jQuery function .
    <script type="text/javascript">  
      
        $(document).ready(function () {  
      
             
            $("#EmpName").autocomplete({  
                source: function (req, resp) {  
                    $.ajax({  
                        url: "/Home/GetAutoEmpName",  
                        type: "POST",  
                        dataType: "json",  
                        data: { Prefix: GetCurrentSearchTerm(req.term) },  
                        success: function (data) {  
                            resp($.map(data, function (item) {  
                                return { label: item.EmpName, value: item.EmpName };  
                            }))  
      
                        }  
                    })  
                },  
                
                select: function (event, ui) {  
                    var LastValue = splitCurrentText(this.value);                
                    LastValue.pop();  
                    LastValue.push(ui.item.value);  
                    LastValue.push("");  
                    this.value = LastValue.join(",");  
                    return false;  
                },  
                focus: function () {  
                return false;  
            }  
            });  
            function splitCurrentText(LastTerm) {  
      
                return LastTerm.split(/,\s*/);  
            }  
      
            function GetCurrentSearchTerm(LastTerm) {  
      
                return splitCurrentText(LastTerm).pop();  
            }  
        });  
    </script>  
    Note: To work preceding function, don't forget to add the reference of the following jQuery UI libraries into the project by CDN or by downloading.
    Step 6: Create View
    Now, let's create Strongly Typed View named EmployeeDetails from EmployeeModel class.


    After adding the necessary code, files, and logic, the EmployeeDetails .cshtml will look like the following:

    @model CommaSepratedAutoCompleteTextBox.Models.EmployeeModel  
      
    @{  
        ViewBag.Title = "www.compilemode.com";  
    }  
    <script type="text/javascript">  
      
        $(document).ready(function () {  
      
             
            $("#EmpName").autocomplete({  
                source: function (req, resp) {  
                    $.ajax({  
                        url: "/Home/GetAutoEmpName",  
                        type: "POST",  
                        dataType: "json",  
                        data: { Prefix: GetCurrentSearchTerm(req.term) },  
                        success: function (data) {  
                            resp($.map(data, function (item) {  
                                return { label: item.EmpName, value: item.EmpName };  
                            }))  
      
                        }  
                    })  
                },  
                
                select: function (event, ui) {  
                    var LastValue = splitCurrentText(this.value);                
                    LastValue.pop();  
                    LastValue.push(ui.item.value);  
                    LastValue.push("");  
                    this.value = LastValue.join(",");  
                    return false;  
                },  
                focus: function () {  
                return false;  
            }  
            });  
            function splitCurrentText(LastTerm) {  
      
                return LastTerm.split(/,\s*/);  
            }  
      
            function GetCurrentSearchTerm(LastTerm) {  
      
                return splitCurrentText(LastTerm).pop();  
            }  
        });  
    </script>  
      
    @using (Html.BeginForm())   
    {    
        <div class="form-horizontal">  
         <hr />  
            <div class="form-group">  
                  
                <div class="col-md-10">  
                    @Html.EditorFor(model => model.EmpName, new { htmlAttributes = new { @class = "form-control" } })  
                </div>  
            </div>  
      
        </div>  
    }  

    Now, run the application. Type any word and it will auto populate the records which exactly start with the first word, as in the following screenshot:


    Now, after selecting the particular records, it is added into TextBox with comma. Now, type another initial letter and it will popup the list of records.


    Now, add multiple records with commas. The TextBox will look like as follows.

    From all preceding examples and explanation, I hope you learned how to create the comma separated auto complete TextBox using jQuery UI in ASP.NET MVC.
    Note
    • Since this is a demo, it might not be using proper standards. So, improve it according to your skills.
    Summary
    I hope this article is useful for all the readers. If you have any suggestions, please contact me.
    Read more articles on ASP.NET MVC

    AutoComplete TextBox In ASP.NET MVC Using Json Data

    In many application we need to allow user to select data from master details such city list , country list or any other , Usually dropdownlist is used to allow to choose details from multiple list of records but if records are huge this drop down list approach will be fail So to allow user to pop up the list as per their search term then Autocomplete textbox is used which is proper approach . In this article we will implement auto complete textbox with the help of jQuery UI library from database with json data. So let us implement this requirement step by step,
    1. "Start", then "All Programs" and select "Microsoft Visual Studio 2015".
    2. "File", then "New" and click "Project", then select "ASP.NET Web Application Template", then provide the Project a name as you wish and click on OK.
    3. Choose MVC empty application option and click on OK
    Step 2: Add model class.

    Right click on Model folder in the created MVC application and add class named CityModel and right the following line of code,

    CityModel.cs
    public class City  
      {  
          public int Id { get; set; }  
          public string Name { get; set; }  
      
      }  
    Step 3: Add user and admin controller

    Right click on Controller folder in the created MVC application and add the controller class as:

    Now after selecting controller template, click on add button then the following window appears,


    Specify the controller name and click on add button, Now open the HomeController.cs file and write the following code into the Home controller class to bind and create the generic list from model class as in the following,

    HomeController.cs
    using System.Collections.Generic;  
    using System.Linq;  
    using System.Web.Mvc;  
    using AutoCompleteInMVCJson.Models;  
    namespace AutoCompleteInMVCJson.Controllers  
    {  
        public class HomeController : Controller  
        {  
            // GET: Home  
            [HttpGet]  
            public ActionResult Index()  
            {  
                return View();  
            }  
            [HttpPost]  
            public JsonResult Index(string Prefix)  
            {  
                //Note : you can bind same list from database  
                List<City> ObjList = new List<City>()  
                {  
      
                    new City {Id=1,Name="Latur" },  
                    new City {Id=2,Name="Mumbai" },  
                    new City {Id=3,Name="Pune" },  
                    new City {Id=4,Name="Delhi" },  
                    new City {Id=5,Name="Dehradun" },  
                    new City {Id=6,Name="Noida" },  
                    new City {Id=7,Name="New Delhi" }  
      
            };  
                //Searching records from list using LINQ query  
                var CityName = (from N in ObjList  
                                where N.Name.StartsWith(Prefix)  
                              select new { N.Name });  
                return Json(CityName, JsonRequestBehavior.AllowGet);  
            }  
        }  
    }  
    In the above code, instead of going to database for records we are creating the generic list from model class and we will fetch records from above generic list.

    Step 4:
    Reference jQuery UI css and js library reference as there are many ways to add the reference of jQuery library into the our project. The following are some methods:
    • Using NuGet package manager , you can install library and reference into the project
    • Use CDN library provided by Microsoft, jQuery, Google or any other which requires active internet connection.
    • Download jQuery files from jQuery official website and reference into the project.
    In this example we will use jQuery CDN library.

    Step 5: Create jQuery Ajax function to call controller JSON action method and invoke autocomplete function,
    $(document).ready(function () {  
           $("#CityName").autocomplete({  
               source: function(request,response) {  
                   $.ajax({  
                       url: "/Home/Index",  
                       type: "POST",  
                       dataType: "json",  
                       data: { Prefix: request.term },  
                       success: function (data) {  
                           response($.map(data, function (item) {  
                               return { label: item.Name, value: item.Name };  
                           }))  
      
                       }  
                   })  
               },  
               messages: {  
                   noResults: "", results: ""  
               }  
           });  
       })  
    To work above function don't forget to add the reference of the following jQuery CDN library as,
    <link rel="stylesheet" href="//code.jquery.com/ui/1.11.4/themes/smoothness/jquery-ui.css">  
    <script src="//code.jquery.com/jquery-1.10.2.js"></script>  
    <script src="//code.jquery.com/ui/1.11.4/jquery-ui.js"></script> 
    Step 6:
    Add view named index and put above json function into the view. After adding code necessary files and logic the Index.cshtml will look like the following,

    Index.cshtml

    @model AutoCompleteInMVCJson.Models.CityModel  
    @{  
        ViewBag.Title = "www.compilemode.com";  
    }  
    <link rel="stylesheet" href="//code.jquery.com/ui/1.11.4/themes/smoothness/jquery-ui.css">  
    <script src="//code.jquery.com/jquery-1.10.2.js"></script>  
    <script src="//code.jquery.com/ui/1.11.4/jquery-ui.js"></script>  
    <script type="text/javascript">  
        $(document).ready(function () {  
            $("#CityName").autocomplete({  
                source: function (request, response) {  
                    $.ajax({  
                        url: "/Home/Index",  
                        type: "POST",  
                        dataType: "json",  
                        data: { Prefix: request.term },  
                        success: function (data) {  
                            response($.map(data, function (item) {  
                                return { label: item.Name, value: item.Name };  
                            }))  
      
                        }  
                    })  
                },  
                messages: {  
                    noResults: "", results: ""  
                }  
            });  
        })  
    </script>  
    @using (Html.BeginForm())  
    {  
        @Html.AntiForgeryToken()  
      
        <div class="form-horizontal">  
      
            <hr />  
      
            <div class="form-group">  
      
                <div class="col-md-12">  
                    @Html.EditorFor(model => model.CityName, new { htmlAttributes = new { @class = "form-control" } })  
      
                </div>  
            </div>  
      
        </div>  
    }  
    Now run the application and type any word then it will auto populate the records which exactly start with first word as in the following screenshot,
     
    If you want to auto populate the records which contain any typed alphabet,then just change the LINQ query as contain. Now type any word it will search as follows,
     
    From all the above examples, I hope you learned how to create the auto complete textbox using jQuery UI in ASP.NET MVC.

    Note:
    • For the detailed code, please download the sample zip file.
    • Perform changes in Web.config file as per your server location.
    • You need to use the jQuery library.
    Download Sample Code :  AutoCompleteInMVCJson.zip
      Summary

      For all the examples above, we learned how to use jQuery UI to create auto complete textbox in ASP.NET MVC. I hope this article is useful for all readers. If you have a suggestion then please contact me. 

      Display Data From DataBase in ASP.NET Using Web API And jQuey Json

      I have often read the common question in forum posts as how to insert the ASP.Net form data into a database and display it using the Web API. So based on the this requirement, I have decided to write this article. Let us start creating an application so beginners can also understand.

      Step 1 : Create Table and Stored Procedure

      First create the table named Employee using the following script:

      CREATE TABLE [dbo].[Employee](    
          [Id] [int] IDENTITY(1,1) NOT NULL,    
          [FirstName] [varchar](50) NULL,    
          [LastName] [varchar](50) NULL,    
          [Company] [varchar](50) NULL,    
       CONSTRAINT [PK_Employee] PRIMARY KEY CLUSTERED     
      (    
          [Id] ASC    
      )WITH (PAD_INDEX = OFF, STATISTICS_NORECOMPUTE = OFF, IGNORE_DUP_KEY = OFF, ALLOW_ROW_LOCKS = ON, ALLOW_PAGE_LOCKS = ON) ON [PRIMARY]    
      ) ON [PRIMARY]   
      

      Now create a Stored Procedure to insert the data as:

      Create Procedure [dbo].[InsertData]    
      (    
      @FName varchar(50),    
      @Lname Varchar(50),    
      @Compnay varchar(50)    
          
      )    
      as    
      begin    
          
      INSERT INTO [dbo].[Employee]    
                 ([FirstName]    
                 ,[LastName]    
                 ,[Company])    
           VALUES    
                 (    
                 @FName,    
                 @Lname,    
                 @Compnay    
                )    
      End 
      

      Step 2 : Create Web Application

      Now Let us create the sample web application as follows:
      1. "Start" -> "All Programs" -> "Microsoft Visual Studio 2010".
      2. "File" -> "New Project" -> "C#" -> "Empty Project" (to avoid adding a master page).
      3. Provide the website a name such as "DisplayingFormDataUsingWebAPI" or another as you wish and specify the location.
      4. Then right-click on the Solution Explorer -> "Add New Item" -> Add Web Form.
      5. Drag and drop three text boxes and one Button onto the <form> section of the Default.aspx page.
      Now the default.aspx page source code will be as follows.

      <%@ Page Language="C#" AutoEventWireup="true" CodeBehind="Default.aspx.cs" Inherits="InsertingFormDataUsingWebAPI.Default" %>      
                
          <!DOCTYPE html PUBLIC "-//W3C//DTD XHTML 1.0 Transitional//EN" "http://www.w3.org/TR/xhtml1/DTD/xhtml1-transitional.dtd">      
                
          <html xmlns="http://www.w3.org/1999/xhtml">      
          <head id="Head1" runat="server">      
              <title>Article  by Vithal Wadje</title>      
                   
          </head>      
          <body style="background-color:Navy;color:White">      
              <form id="form1" runat="server">      
              <br /><br />      
              <table>      
                  <tr>      
                      <td>      
                          First Name      
                      </td>      
                      <td>      
                          <asp:TextBox runat="server" ID="txtFirstName" />      
                      </td>      
                  </tr>      
                  <tr>      
                      <td>      
                          Last Name      
                      </td>      
                      <td>      
                          <asp:TextBox runat="server" ID="txtLastName" />      
                      </td>      
                  </tr>      
                  <tr>      
                      <td>      
                          Company      
                      </td>      
                      <td>      
                          <asp:TextBox runat="server" ID="txtCompany" />      
                      </td>      
                  </tr>      
                  <tr>      
                      <td>      
                      </td>      
                      <td>      
                          <asp:Button Text="Save" runat="server" ID="btnSave" />      
                      </td>      
                  </tr>      
              </table>      
              <br />      
                    
              </form>      
          </body>      
          </html>  
      

      Step 3 : Create Property Class

      We have a .aspx Web form to insert the records. Now create the Property class named Employee class as in the following:

          public class Employee     
          {    
             public string FirstName { get; set; }    
             public string LastName { get; set; }    
             public string Company { get; set; }    
            
          }   
      

      Step 4: Add Web API Controller Class

      We created the preceding properties as in our table structure to insert the preceding employee details into the database. Now let us add a web API controller class into the web application by right-clicking on the project in the Solution Explorer and rename it EmpController with controller suffix.

      Step 5: Create Repository Class to add and view records

      Now add the following method into the Repository Class named AddEmployee and GetAllEmp that does all the data access related activities:

      public IEnumerable<Employee> GetAllEmp()  
           {  
               connection();  
         
             com = new SqlCommand("select *from Employee", con);  
             com.CommandType = CommandType.Text;  
               SqlDataAdapter da = new SqlDataAdapter(com);  
               DataTable dt = new DataTable();  
               con.Open();  
               da.Fill(dt);  
               con.Close();  
        
               foreach (DataRow row in dt.Rows)  
               {  
                   yield return new Employee  
                   {  
                       Id = Convert.ToInt32(row["Id"]),  
                       FirstName = Convert.ToString(row["FirstName"]),  
                       LastName = Convert.ToString(row["LastName"]),  
                       Company = Convert.ToString(row["Company"]),  
        
                   };  
               }  
        
           }  
           public string AddEmployees(Employee Emp)  
           {  
               connection();  
               com = new SqlCommand("InsertData", con);  
               com.CommandType = CommandType.StoredProcedure;  
               com.Parameters.AddWithValue("@FName", Emp.FirstName);  
               com.Parameters.AddWithValue("@Lname", Emp.LastName);  
               com.Parameters.AddWithValue("@Compnay", Emp.Company);  
               con.Open();  
               int i = com.ExecuteNonQuery();  
               con.Close();  
             
               if (i >= 1)  
               {  
                   return "New Employee Added Successfully"; 
               }  
               else  
               {  
                   return "Employee Not Added"; 
               }         
           }
      

      The entire EmpRepository class file will be as follows:

          using System;  
          using System.Collections.Generic;  
          using System.Linq;  
          using System.Web;  
          using System.Data.SqlClient;  
          using System.Configuration;  
          using System.Data;  
            
          namespace DisplayingFormDataUsingWebAPI  
          {  
              public class EmpRepository  
              {  
            
                  private SqlConnection con;  
                  private SqlCommand com;  
                  
                  private void connection()  
                  {  
                      string constr = ConfigurationManager.ConnectionStrings["getconn"].ToString();  
                      con = new SqlConnection(constr);  
            
            
                  }  
                  public IEnumerable<Employee> GetAllEmp()  
                  {  
                      connection();      
                    com = new SqlCommand("select *from Employee", con);  
                    com.CommandType = CommandType.Text;  
                      SqlDataAdapter da = new SqlDataAdapter(com);  
                      DataTable dt = new DataTable();  
                      con.Open();  
                      da.Fill(dt);  
                      con.Close();  
            
                      foreach (DataRow row in dt.Rows)  
                      {  
                          yield return new Employee  
                          {  
                              Id = Convert.ToInt32(row["Id"]),  
                              FirstName = Convert.ToString(row["FirstName"]),  
                              LastName = Convert.ToString(row["LastName"]),  
                              Company = Convert.ToString(row["Company"]),  
            
                          };  
                      }  
            
                  }  
                  public string AddEmployees(Employee Emp)  
                  {  
                      connection();  
                      com = new SqlCommand("InsertData", con);  
                      com.CommandType = CommandType.StoredProcedure;  
                      com.Parameters.AddWithValue("@FName", Emp.FirstName);  
                      com.Parameters.AddWithValue("@Lname", Emp.LastName);  
                      com.Parameters.AddWithValue("@Compnay", Emp.Company);  
                      con.Open();  
                      int i = com.ExecuteNonQuery();  
                      con.Close();  
                    
                      if (i >= 1)  
                      {  
                          return "New Employee Added Successfully";  
            
                      }  
                      else  
                      {  
                          return "Employee Not Added";  
            
                      }            
                  }  
              }  
          } 
      

      Step 6: Create Post and Get method

      Create a Post and Get method in the ASP.Net Web API Controller Class. Open the EmpController class that we created, delete the existing methods and create the AddEmployees and GetAllEmp method and call the EmpRepository class method as in the following:

          //creating the object of EmpRepository class  
                static EmpRepository repository = new EmpRepository();  
            
                public IEnumerable<Employee> GetAllEmp()  
                {  
                    var users = repository.GetAllEmp();  
                    return users;  
                }  
                public string AddEmployees(Employee Emp)  
                {  
                    //calling EmpRepository Class Method and storing Repsonse   
                    var response = repository.AddEmployees(Emp);  
                    return response;  
            
                } 
      

      You have seen that the preceding EmpController class is inherited from the ApiController class and we have created the method AddEmployee that calls the EmpRepository class method named AddEmployees. The entire EmpController class will be as follows:

          using System;  
          using System.Collections.Generic;  
          using System.Linq;  
          using System.Net;  
          using System.Net.Http;  
          using System.Web.Http;  
            
          namespace DisplayingFormDataUsingWebAPI  
          {  
              public class EmpController : ApiController  
              {  
            
                  //creating the object of EmpRepository class  
                  static EmpRepository repository = new EmpRepository();  
            
                  public IEnumerable<Employee> GetAllEmp()  
                  {  
                      var users = repository.GetAllEmp();  
                      return users;  
                  }  
                  public string AddEmployees(Employee Emp)  
                  {  
                      //calling EmpRepository Class Method and storing Repsonse   
                      var response = repository.AddEmployees(Emp);  
                      return response;  
            
                  }  
            
              }  
          } 
      

      Step 7: Call ASP.Net Web API Controller method

      Call the ASP.Net Web API Controller method from the .aspx page using JSON. Now we need to call the Web API controller method from the .aspx page. To do this we need to create a JSON method using jQuery as in the following:

          <script type="text/javascript">  
               function GetAllEmp() {  
                     $.getJSON("api/Emp", function (data) {  
                         $('#bindemp').empty();  
                         $.each(data, function (key, val) {  
                           
                             var row = "<tr><td>" + val.Id + "</td> <td></td>  <td>" + val.FirstName + "  " + val.LastName + "</td> <td></td> <td>" + val.Company +  
                                 "</td></tr>";  
            
                             $(row).appendTo($('#bindemp'));  
            
                         });  
                     });  
                 }        
                 function AddEmp() {  
                     
                     var Emp = {};  
                     Emp.FirstName = $("#txtFirstName").val();  
                     Emp.LastName = $("#txtLastName").val();           
                     Emp.Company = $("#txtCompany").val();  
            
                     $.ajax({  
                         url:"<%=Page.ResolveUrl("/api/Emp/AddEmployees")%>",   
                         type: "POST",  
                         contentType: "application/json;charset=utf-8",  
                         data: JSON.stringify(Emp),  
                         dataType: "json",  
                         success: function (response) {  
            
                             alert(response);  
                          GetAllEmp();
                         },  
            
                         error: function (x, e) {  
                             alert('Failed');  
                             alert(x.responseText);  
                             alert(x.status);  
            
                         }  
                     });  
                 }
                 $(document).ready(function ()  
                  {  
            
                    GetAllEmp();  
            
                     $("#btnSave").click(function (e) {
                         AddEmp();  
                         e.preventDefault();
                     });
                 });  
            
             </script> 


      Now the entire default.aspx page will be as follows:


          <%@ Page Language="C#" AutoEventWireup="true" CodeBehind="Default.aspx.cs" Inherits="DisplayingFormDataUsingWebAPI.Default" %>  
            
          <!DOCTYPE html PUBLIC "-//W3C//DTD XHTML 1.0 Transitional//EN" "http://www.w3.org/TR/xhtml1/DTD/xhtml1-transitional.dtd">  
            
          <html xmlns="http://www.w3.org/1999/xhtml">  
          <head id="Head1" runat="server">  
              <title>Article  by Vithal Wadje</title>  
              <script src="jquery-1.7.1.js" type="text/javascript"></script>  
                
              <script type="text/javascript">  
                function GetAllEmp() {  
                      $.getJSON("api/Emp", function (data) {  
                          $('#bindemp').empty();  
                          $.each(data, function (key, val) {  
                            
                              var row = "<tr><td>" + val.Id + "</td> <td></td>  <td>" + val.FirstName + "  " + val.LastName + "</td> <td></td> <td>" + val.Company +  
                                  "</td></tr>";  
            
                              $(row).appendTo($('#bindemp'));  
            
                          });  
                      });  
                  }  
                   
                  function AddEmp() {  
                      
                      var Emp = {};  
                      Emp.FirstName = $("#txtFirstName").val();  
                      Emp.LastName = $("#txtLastName").val();           
                      Emp.Company = $("#txtCompany").val();  
            
                      $.ajax({  
                          url:"<%=Page.ResolveUrl("/api/Emp/AddEmployees")%>",   
                          type: "POST",  
                          contentType: "application/json;charset=utf-8",  
                          data: JSON.stringify(Emp),  
                          dataType: "json",  
                          success: function (response) {  
            
                              alert(response);  
                           GetAllEmp();       
            
                          },  
                          error: function (x, e) {  
                              alert('Failed');  
                              alert(x.responseText);  
                              alert(x.status);  
                          }  
                      });
            
                  }
            
                  $(document).ready(function ()  
                   {
                     GetAllEmp();
                      $("#btnSave").click(function (e) {      
            
                          AddEmp();  
                          e.preventDefault();
                      });
                  });
              </script>  
          </head>  
          <body style="background-color:navy;color:White">  
              <form id="form1" runat="server">  
              <br /><br />  
              <table>  
                  <tr>  
                      <td>  
                          First Name  
                      </td>  
                      <td>  
                          <asp:TextBox runat="server" ID="txtFirstName" />  
                      </td>  
                  </tr>  
                  <tr>  
                      <td>  
                          Last Name  
                      </td>  
                      <td>  
                          <asp:TextBox runat="server" ID="txtLastName" />  
                      </td>  
                  </tr>  
                  <tr>  
                      <td>  
                          Company  
                      </td>  
                      <td>  
                          <asp:TextBox runat="server" ID="txtCompany" />  
                      </td>  
                  </tr>  
                  <tr>  
                      <td>  
                      </td>  
                      <td>  
                          <asp:Button Text="Save" runat="server" ID="btnSave" />  
                      </td>  
                  </tr>  
                  </table>  
                  <br />  
                  <table>  
                  
                  <thead>  
                      <tr>  
                          <td>  
                              Id  
                          </td>  
                         <td></td>  
                         
                          <td>  
                            Name  
                          </td>  
                           <td></td>  
                          <td>  
                              Company  
                          </td>  
                      </tr>  
                  </thead>  
                 
                  <tbody id="bindemp">  
                  </tbody>  
              </table>  
              
              </form>  
          </body>  
          </html> 
      

      Now run the application, the UI will be as follows:


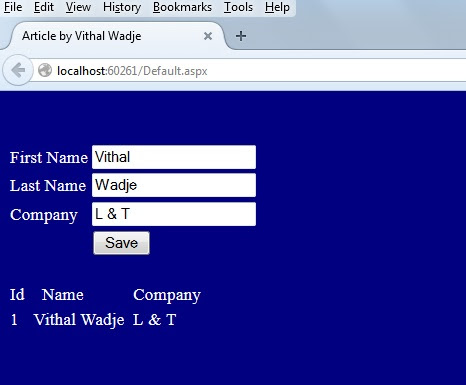
      Now enter some records into the preceding fields and click on the Save button. Then the following screen shows the added records.


      Now add another record.


      Now you have seen how the insertion of records into the database and display it using Web API with Web Forms works.

      Notes

      • Do a proper validation such as date input values when implementing.
      • Make the changes in the web.config file depending on your server details for the connection string.
      Summary

      You have learned here how to insert records into the database and display it using the ASP.Net Web API with Web Forms. I hope this article is useful for all readers. If you have a suggestion then please contact me.

      www.CodeNirvana.in

      Protected by Copyscape
      Copyright © Compilemode